Wednesday, July 25, 2012

A Closer Look at the Materials and Construction

These are exposed adobe bricks in the attic. If you didn't know, you would think they were baked or fired bricks because they are rock-hard. See how soft - like frosting - the mud mortar was when they built the wall?
Compare the attic adobes to this damp wall in the cellar. You can carve at these adobes because they are so soft and crumbly. Here you glimpse the stone foundation. See the one dark brick, the black sheep of the wall?
Now we are in the cellar looking at the stone foundation - oolitic lime-stone with earthen mortar, earthen plaster, and white-wash or lime-wash flaking off. You see how soft and compatible the materials are after 150 years of settling?
A view of the cellar showing the cement block retaining wall that was put in when there were some structural issues in the 40's?
This is the exterior where I removed some of the stucco to investigate the materials. Here you see that the wall is becoming hollow as the adobes turn to dust. There is some stone stacked horizontally to the left, and mud plaster buffer coats nestled up to the stucco to the right.

Thursday, July 5, 2012

Last Summer

The best time to visit Ephraim is during the summer months, the house stays nice and cool and the days seem to stretch on forever, much like they did in childhood. You're all invited.

I always like to put a vase of flowers here for the ancestors to enjoy.


Sofija in vintage dress-up clothes. 


Sofija and Joaquin Aviles-Lindsey, visiting from LA.


With Trent Call.


Monday, July 2, 2012

The Original Coating

This is an amazing photo full of historical information. Not only does it show Wanda and Dale Sorenson playing by the side of the house around 1918, but it shows so well the original decorative plaster coating on the house. It was a thin lime plaster applied to the outermost layer of earthen plaster. It was stamped or scored and colored to look like red brick. See how soft and worn it is?


Remember this investigation I made into the wall by the back door to the bedroom?


This sample shows us the inside of the stucco. It tells us a lot about the original coating. Here you see that the present day cement stucco was applied with a lot of pressure to chicken wire nailed to the earthen walls.


The red pigment here is the original red of the decorative "brick" plaster. It came off and adhered to the cement coat during application. Here you see the off-white lime plaster that the red pigment was applied to.


A side view of the removed stucco with protruding 2" nails.


This is an example of the earthen plaster. Multiple coats were applied directly to the adobe bricks to protect them. See the random stones and bits of straw? They would have used the earth excavated from the cellar and foundation to build with.


This piece of earthen plaster came from the corner of the blue room. It's 2" thick in some places. And also you see a piece of fired brick, like terracotta, that was also in the wall.


Present Condition


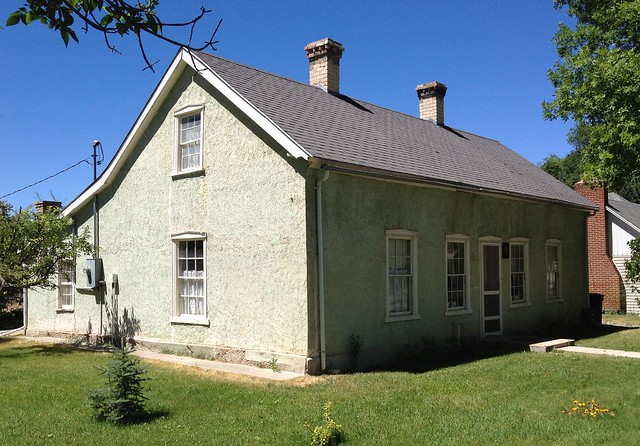
The exterior cement stucco was put on in the 1930's or 1940's. The pastel green we all associate with the house is typical of the Art Deco/post-war era. 
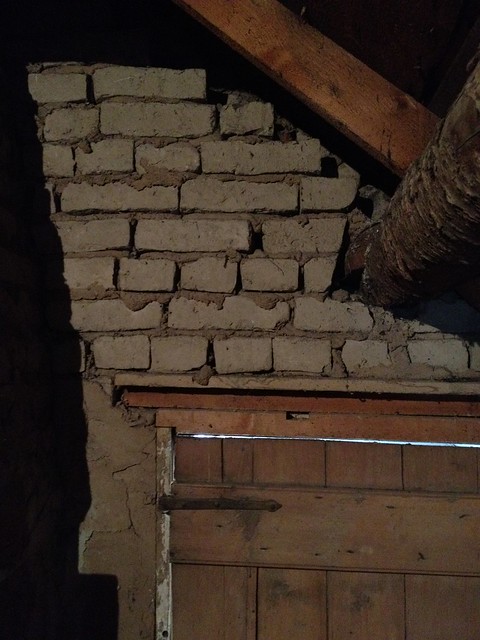
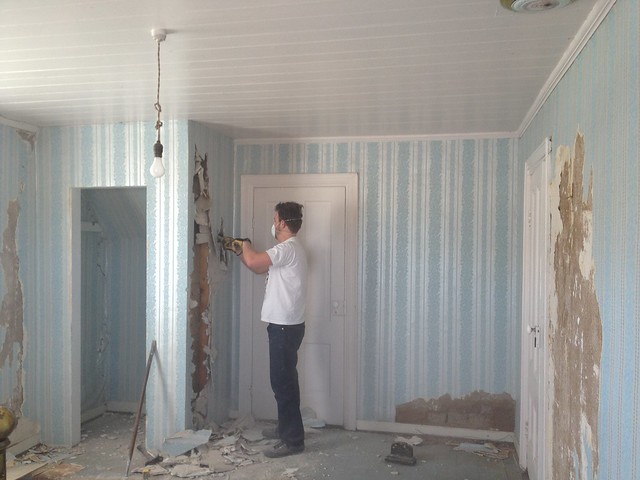
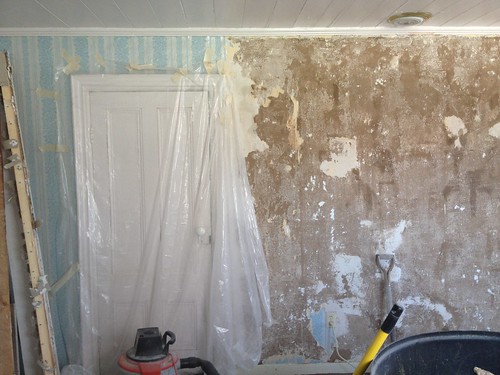
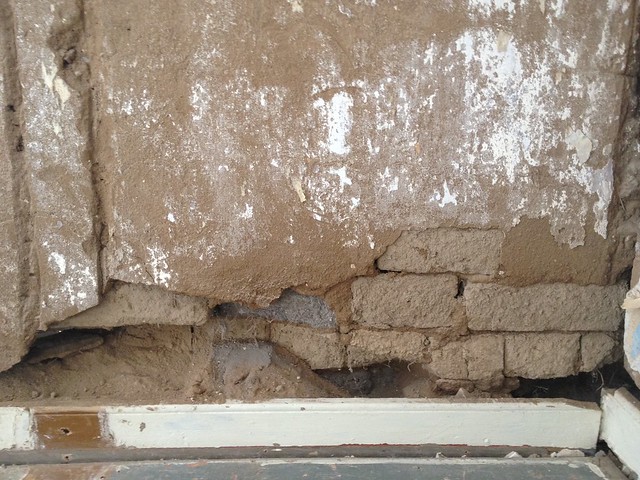
This cement stucco coating has really stood the test of time, but the hard impervious nature of the coating has become more of a liability to the softer adobe system. The east wall of the house (the exterior side of the deteriorated wall in the blue bedroom) is the most exposed side of the house, getting the brunt of the harsh weather. There is a "belly" or visible bulge through the middle of the one and a half-story wall, and when you knock on the stucco much of the wall sounds hollow. Yikes!
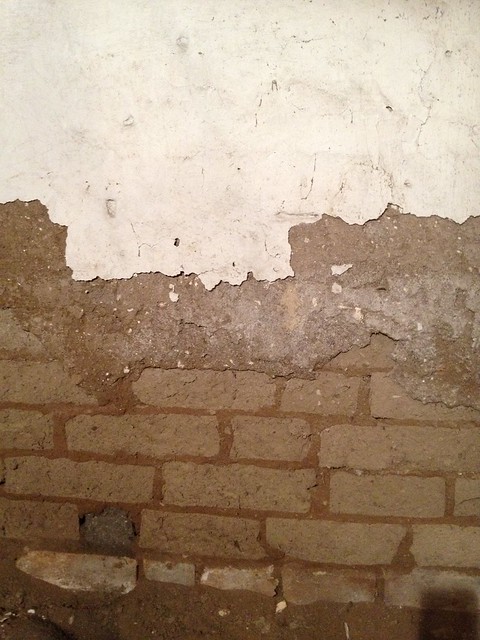
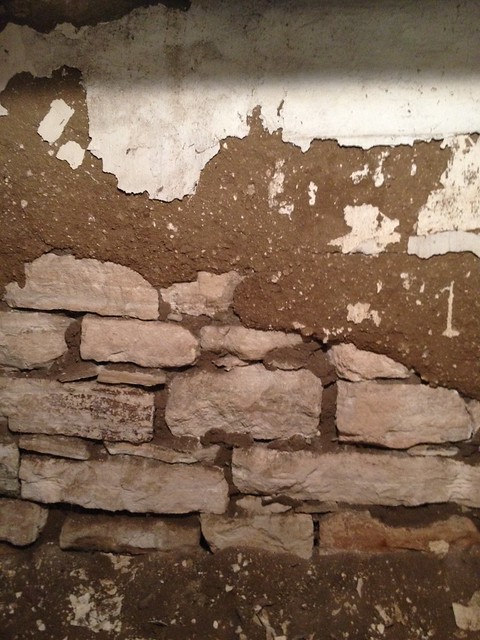
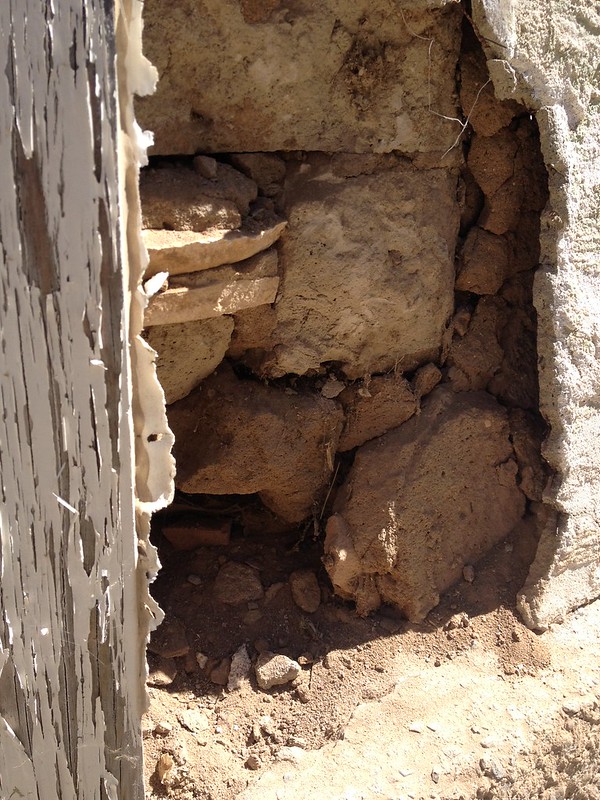
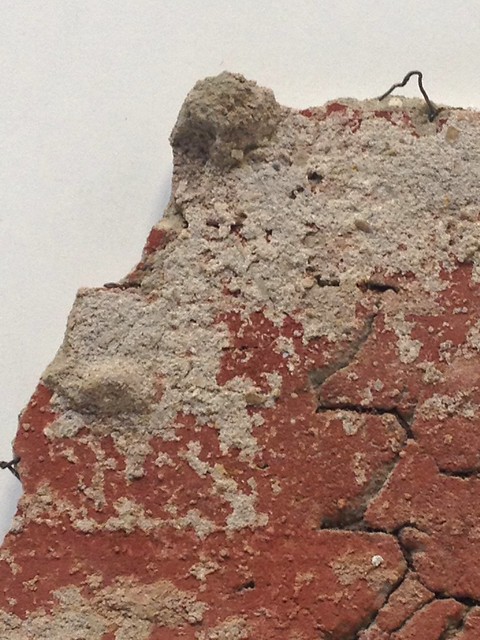
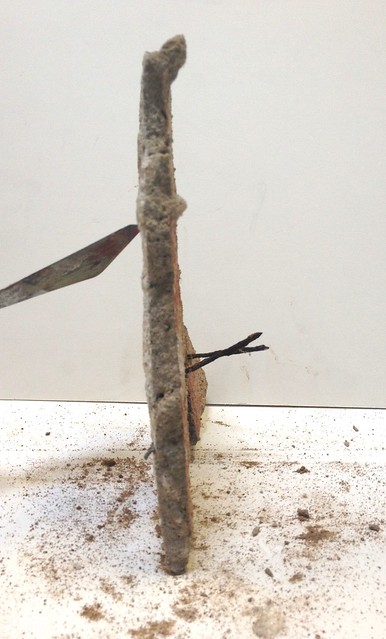
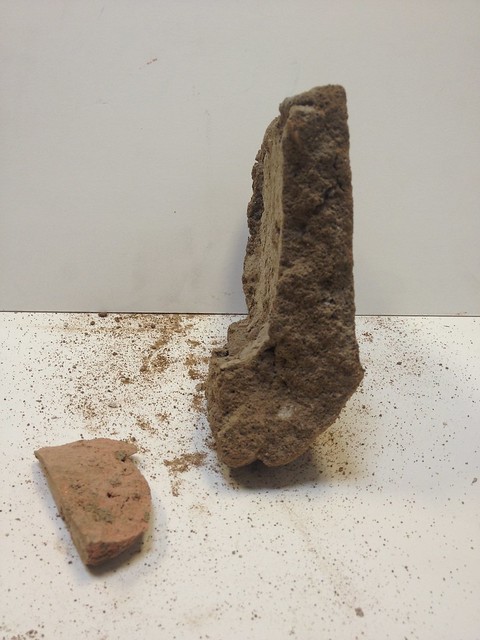
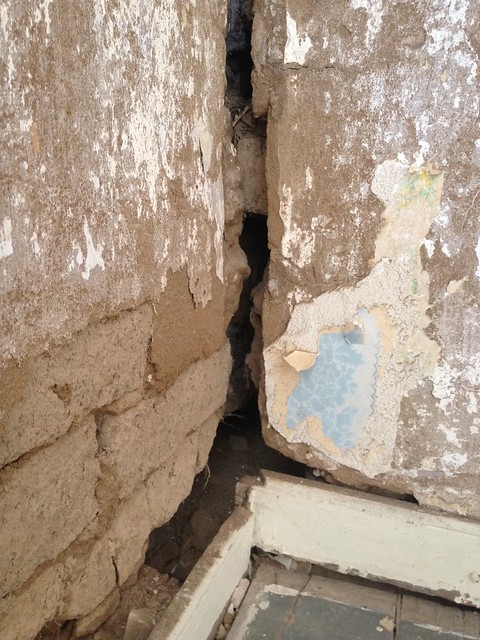
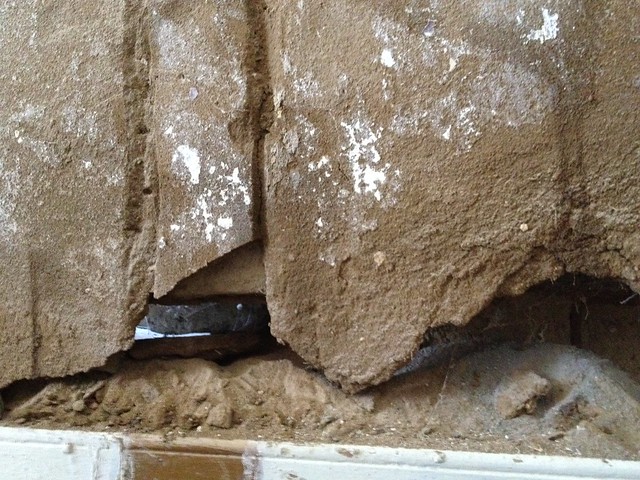
Wherever there is a crack in the exterior stucco coating moisture is wicked by and absorbed into the thirsty clay adobe causing it to swell. Since the cement is so hard and impervious to water there is no way for the adobes to dry out and they start to deteriorate, becoming soft and crumbly.
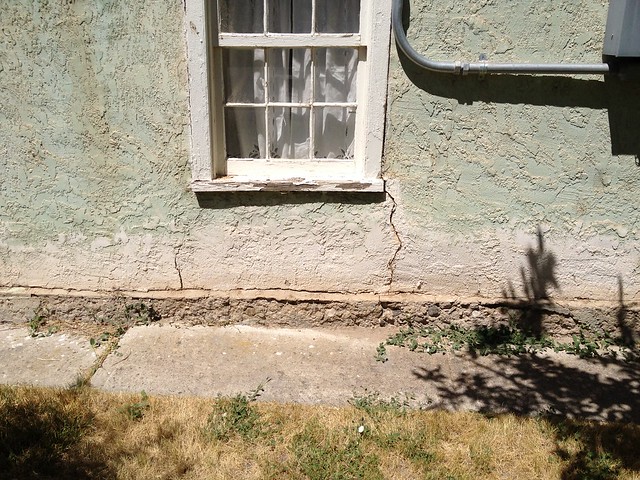
 Particularly damaging are the severe freeze and thaw cycles typical of Sanpete weather. Also, good drainage and landscaping are of vital importance to preserving structural stability.

 An example of a bulging area on the back of the house. The west side is more protected by Glen and Bertha's house. Lets hope it's in better shape.
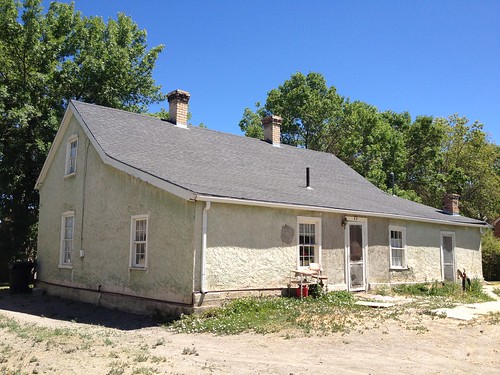
 The back of the house today.
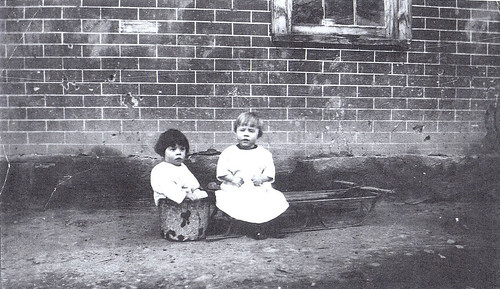
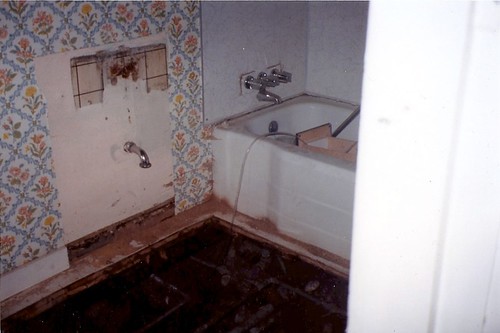
 Remember this back porch addition? I think the washing machine was out there. Wanda had the add-on removed so she could nominate the structure for historical status.
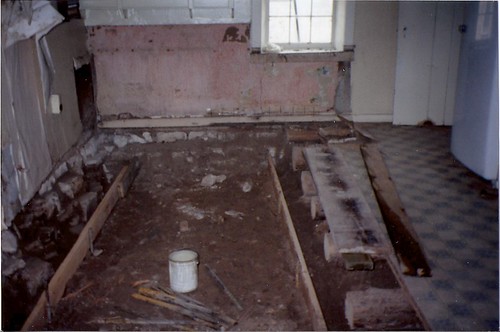
 Old photos from when Wanda last had some stabilization work done
 I think they were doing the main sewer line here.

Sunday, July 1, 2012

Blue Room


Remember this? Dirt from the adobe wall was pouring out from under the beloved silvery-blue wallpaper I had admired throughout my childhood. It was going to have to come off.

So, we knew there were some deterioration issues in the blue room, especially on the east wall in the area of the closet and under the stairway.

The cleared out room. Trent begins to demo the closet.

Meanwhile I am removing the famous silvery blue wallpaper down to the original earthen plaster.

Here you see how the front northeast corner of the house has really settled and there are cracks in the exterior stucco and a vine coming through. Here you can also see how the original floor boards were once painted red.

For the record, Trent in a good sport and actually doesn't mind doing these projects. He also likes hanging out in Ephraim because it's a nice change from the studio in SLC.

Don't you love finding all the wallpaper under the wallpaper? Here you can also see that the ceiling used to be painted salmon pink! I think Jennie was partial to salmon pink.

See the previous patch job under the window and the way the adobes start to have holes toward the corner?

Here you see the construction: the adobe bricks with mud plaster in between, multiple coats of earthen plaster and then traces of the white-wash or lime-wash that was the original protective and decorative wall finish.

See the daylight coming through from a crack in the exterior? Yikes!

Adobe Workshop at TBSI


Last fall, Dana Echohawk and I took the adobe restoration class at the Traditional Building Institute at Snow College. This is the interior wall of the TBSI house that we worked on during the three-day workshop taught by Doni Kiffmeyer. 
This is Doni's book. He was an excellent instructor and the entire group came over to the house after the class. He has been kind enough to give me some recommendations for proceeding with our preservation work.
This set-up for sifting sand is called a "grizzly". Here's Dana doing the shoveling.
We made our mud plaster by digging a pit in the TBSI yard, sifting out the large rocks, and then adding water, straw, and sand to make a stable mud plaster. It's a lot of work, to be sure, but isn't it amazing to think about what our ancestors created with the skills they had and the limited resources they had access to? Lets not forget the Indigenous peoples whose resources became even more limited.
Look at this gorgeous crop of wild plums from the trees by the creek. Dana and I picked all that we could reach and then she took them back to Colorado to make jam, and then she brought several jars back to Ephraim for Memorial Day for everyone to try!

August Family Reunion 2011

Guillermo, Trent, Ammon, and Stryder trying to pull-out a stump.
Joaquin was helping too! And they pulled it out eventually after hitching to an SUV.
 Ephraim was in the midst of a heat wave. Shae, working on some chores.
Guillermo and Ethan rebuilding the stone path.
Everybody worked really hard but I think we had fun too. We also - for the record  - ate really well. Beckie and Stryder brought meat from a cow they'd bought into, and everyone had an assigned meal to be in charge of preparing. We ate outside under the trees at a temporary table we fashioned from boards laying around the yard. It was lovely to be all together!
Sofija and Gabe at the bowling alley!